使用React Native和Firebase进行电子邮件身份验证
发布于:2021-02-03 10:05:20
在每一个应用程序中,你都会看到几种身份验证,比如使用Facebook、Google等进行登录,但人们还是喜欢输入电子邮件和密码。在本教程中,我们将把电子邮件身份验证与React native和Firebase集成在一起。使用firebase使其更易于使用。让我告诉你怎么做?

通过Expo创建新项目
我们不会使用react native cli,而是使用Expo。这将使我们的任务更容易一点。因为使用react native cli,我们至少需要安装XCode或androidstudio来运行和测试应用程序。
https://media.com/media/18214d8333adbb5668f31791a3202b60/href
要使用Expo制作应用程序,您需要键入terminal或CMD:
expo init react native firebase

按下Enter键后,安装开始。安装完成后,使用VS Code打开项目。

要运行该应用程序,您需要使用cd app-folder-name进入它,然后运行命令yarn start。

一旦你运行了这个应用程序,Expo将打开一个新的浏览器窗口。

你可以看到很多可以运行Android和iOS模拟器以及QR码的选项。这里我们使用iOS模拟器来运行这个应用程序。然后打开模拟器或使用你的设备打开Expo应用程序。
您将看到如下屏幕:

如果一切正常,我们就可以出发了。让我们开始真正的编码:
使用本地基础的快速形成引导
为了快速开发我们的界面,我们使用Nativebase进行开发。

要安装native base,请打开一个新终端并运行以下命令:
npm i native-base -s

不要担心在进行本地基础安装过程中是否会出现一些错误。停止expo并再次运行npm安装。

我们将返回正常模式
带有本地基本组件的安装表格
现在,我们已经准备好将必要的Nativebase组件导入到APP.js
import { Container, Item, Form, Input, Button, Label } from "native-base";导入后,我们将为前端窗体构建一个用户界面。
render() {
**return** (
 <Container>
 <Form>
 <Item floatingLabel>
 <Label>Email</Label>
 <Input autoCapitalize="none" autoCorrect={false} />
 </Item>
 <Item floatingLabel>
 <Label>Password</Label>
 <Input
 secureTextEntry={true}
 autoCapitalize="none"
 autoCorrect={false}
 />
 </Item>
 <Button full rounded>
 <Text>SignIn</Text>
 </Button>
 </Form>
 </Container>
 );
 }
一旦你保存了上面显示的代码,然后你就可以在屏幕上看到即时结果。这个概念也被称为热重新加载。

所以让我们把窗体居中对齐。为此,我们将使用样式表属性。只要看看下面的代码,您就可以很容易地理解我们正在用容器处理样式表中的属性。
<Container style={styles.container}>只需在样式中添加注释,我们就可以使其成为中心。
**const** styles = StyleSheet.create({
 container: {
 flex: 1,
 backgroundColor: "#fff",
 // alignItems: "center",
 justifyContent: "center"
 }
});
现在保存代码并查看结果。所有部件居中对齐。太棒了,让我们继续下一步:

将Firebase添加到React本机项目
要添加firebase,我们需要在App.js上运行命令npm i firebase --save和after import firebase,如下所示:
import * as firebase from "firebase";
下一步是创建firebase项目。转到firebase控制台,创建项目查找apikey和配置,如下图所示:

抓取配置并粘贴到APP.js如下图所示:
import * as firebase from "firebase";
import { Container, Item, Form, Input, Button, Label } from "native-base";

var config = {
 apiKey: "AIzaSyDFdsjQWG8IFLXmviNqSiVZMw_ADFl5tpo",
 authDomain: "react-native-firebase-3bde9.firebaseapp.com",
 databaseURL: "https://react-native-firebase-3bde9.firebaseio.com",
 projectId: "react-native-firebase-3bde9",
 storageBucket: "react-native-firebase-3bde9.appspot.com",
 messagingSenderId: "269398778466"
};

firebase.initializeApp(config);
最后,我们成功地将firebase tp添加到了我们的项目中。
注册
对于电子邮件身份验证,我们需要在Firebase控制台上激活电子邮件身份验证。转到firebase控制台并启用它。

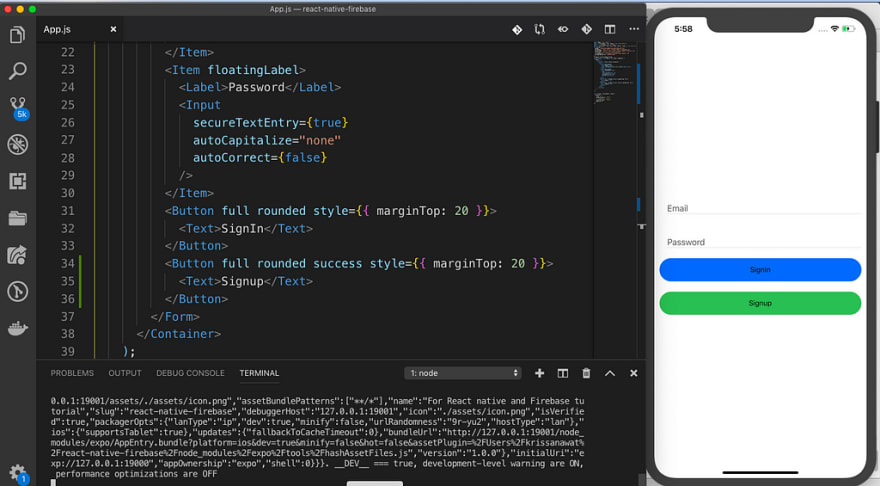
再次回到VS Code并添加一个注册按钮。以便用户填写信息。
<Button full rounded success style={{ marginTop: 20 }}> <Text>Signup</Text>
</Button>
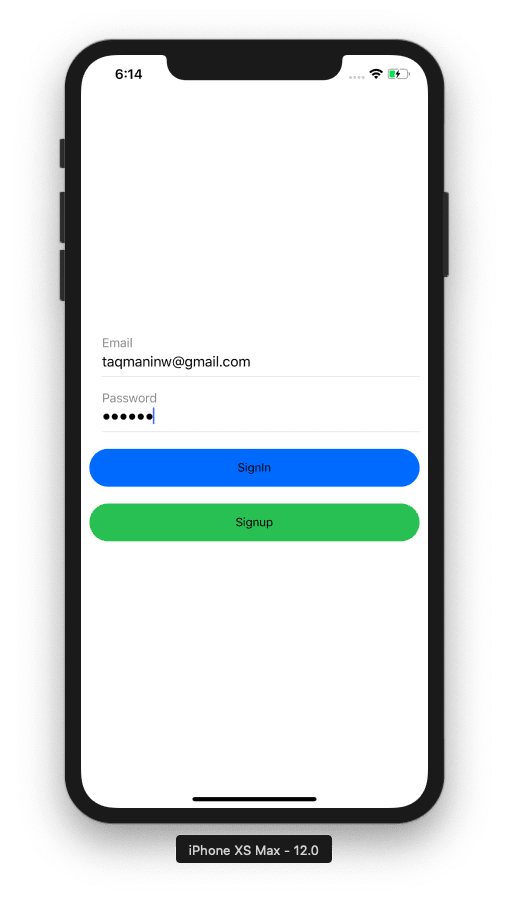
添加按钮后,您将能够通过Signin和signup按钮看到此结果。

让我们为注册按钮编写一点代码。你可以跟着我走。如果你这样做,很少有机会犯错误并看到任何类型的错误。
export default class App extends React.Component {
 constructor(props) {
 super(props);
 this.state = {
 email: "",
 password: ""
 };
 }
 SignUp = (email, password) => {
 try {
 firebase.auth().createUserWithEmailAndPassword(email, password);
 } catch (error) {
 console.log(error.toString(error));
 }
 };
现在,我们创建一个状态来处理表单中的电子邮件和密码,并创建用于处理firebase代码的注册函数。
下一步是用onChangeText向state添加表单值。
<Item floatingLabel>
 <Label>Email</Label>
 <Input
 autoCapitalize="none"
 autoCorrect={false}
 onChangeText={email => this.setState({ email })}
 />
 </Item>
 <Item floatingLabel>
 <Label>Password</Label>
 <Input
 secureTextEntry={true}
 autoCapitalize="none"
 autoCorrect={false}
 onChangeText={password => this.setState({ password })}
 />
我们将使用注册按钮的onPress事件触发注册功能。
onPress={() => this.SignUp(this.state.email, this.state.password)}让我们试着保存并提交表单,以测试我们是否朝着正确的方向前进。

进入并点击注册后,转到firebase控制台。查看firebase数据库,您可以看到我们输入的值。

现在我们已经成功地向Firebase添加了一个新用户。
登录
让我们为登录按钮编码。我们使用了来自注册方法的代码,并对firebase函数进行了一些修改。这样我们才能达到我们想要的。
SignIn = (email, password) => {
**try** {
 firebase.auth().signInWithEmailAndPassword(email, password);
 firebase.auth().onAuthStateChanged(user => {
 alert(user.email);
 })

} **catch** (error) {
 console.log(error.toString(error));
 }
 };
接下来,使用onAuthStateChanged从firebase获取用户数据。所以,如果我们按下这个按钮,一个onPress甚至会呼叫SignIn,它会检查电子邮件和密码是否正确。
onPress={() => this.SignIn(this.state.email, this.state.password)}所以让我们试着登录。

它起作用了。最后,我们做到了。你可以看到一切都很好。
结论
我们使用了Expo,Nativebase,Firebase。我希望你已经学会了。如果你觉得值得,继续分享。
作者介绍
